
Enable Telnet Client
- In order to recover the MDrive or LMD from this state you will need to enable your “Telnet Client” on your computer. By default, with Windows based systems, this client is disabled.
- Open the Widows Control Panel
- Select “Programs and Features”:
- Once in “Programs and Features”, select “Turn Windows features on or off”
- In the “Windows Features” screen, scroll down to “Telnet Client” and select its checkbox:
 Figure 1: Enable Telnet Client
Local Area Connection Properties for Motor IP Address Structure
- When upgrading Ethernet or Drive firmware with an MDrive or LMD motor, you must have your computer’s Local Area Connection Properties set properly in order to complete the upgrade.
- On a Windows 7, 64 bit computer, you can access the Local Area Connection Properties by doing the following:
- From the “Start” Icon in the lower left hand corner of your desktop, locate your Control Panel
- Open the Control Panel and locate the “Network Sharing Center”
- Open the Network Sharing Center and select “Change Adapter Settings”
- Locate the “Local Area Connection” and double click
- Select “Properties” from the “Local Area Connection Status” pop-up box

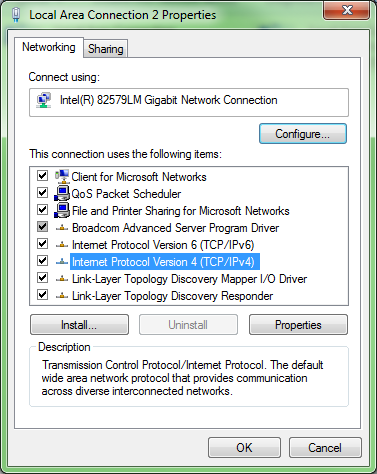 Figure 2: Edit TCP/IP Settings
 - Double click on “Internet Protocol Version 4 (TCP/IPv4)
- Select the “Use The Following IP Address” radio button and enter the following information:
 Figure 3: Set IP Address for NIC
 - After entering in the above IP Address and Subnet Mask information select “OK”
- You have now configured your computer to talk to other devices on a network that have an IP structure that starts with 192.168
Begin drive recovery process
- In order to recover the MDrive or LMD from its faulted mode you must first launch the recently enabled Telnet Client by going to the Windows “Start” icon and typing “Telnet” into the command prompt.
- Once you have typed Telnet, you should see a “Telnet” program in the “Programs” section.
 Figure 4: Telnet Client
 - Once you have selected the “Telnet” program you should see the following on your desktop:
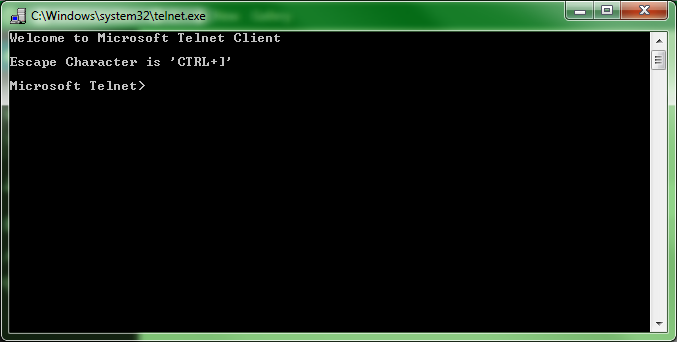 Figure 5: Microsoft Windows Telnet Client
 - After the telnet prompt enter: open 192.168.33.1 then press the “Enter” key.
- You should see the following:
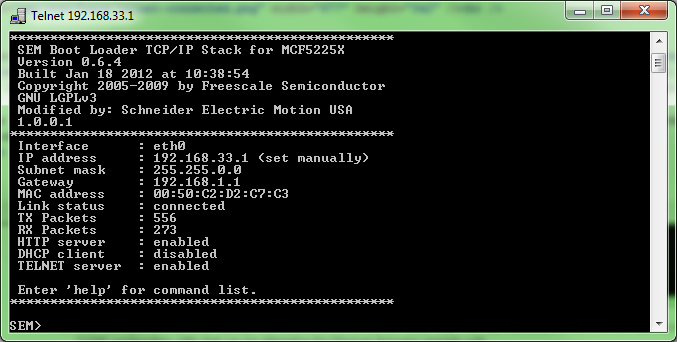 Figure 6: Novanta IMS Ethernet TCP/IP information
 - After the Novanta IMS> prompt enter: set tftp 192.168.33.200 then press the “Enter” key. The 192.168.33.200 is the IP of the machine running the TCP/IP configuration utility that we are attempting the Ethernet firmware upgrade with.
- At the Novanta IMS> now type save then press the “Enter” key. You should see the following through the Telnet Client:
 Figure 7: Set and save TCP/IP Settings via Telnet
 - Do not close the Telnet Client window; we will be using it further shortly.
- Insure that the previous TCP/IP configuration utility session had been closed and then open a fresh instance of the TCP/IP configuration utility.
- Upon opening the TCP/IP Configuration Utility, locate the “View” menu on the top of the utility:
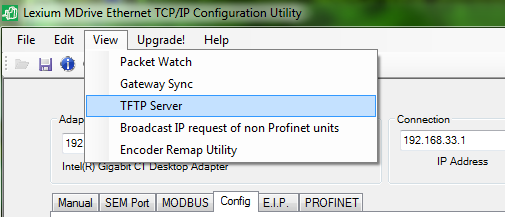 Figure 8: Open TFTP Server
 - Once you have selected “TFTP Server” your screen should look like the following:
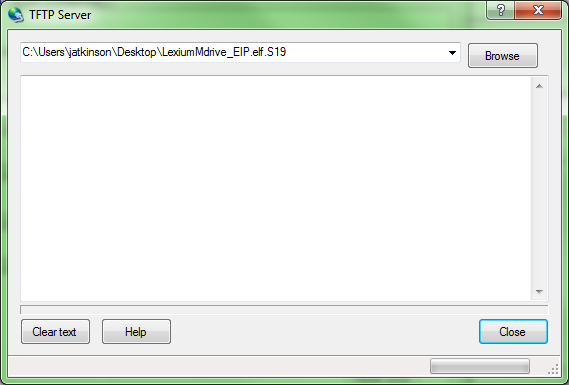 Figure 9: Select firmware file
 - Use the “Browse” button to insure you have pointed the configuration tool to the location of the proper firmware upgrade file for the correct drive type:
 Figure 10: Browse to select upgrade file
 - For this example we are working with an LMD drive type so a selection should be made for the file: “LexiumMdrive_EIP.elf.S19”
 Figure 11: Select firmware upgrade file
 - Once the file has been selected, you now will return to the TFTP Server window.
- In the Telnet Client window, after the Novanta IMS> prompt, enter: reset then press the “Enter” key. Within a few moments the upgrade process will start. Once the process has started you will see the following in the TFTP Server window of the TCP/IP configuration utility:
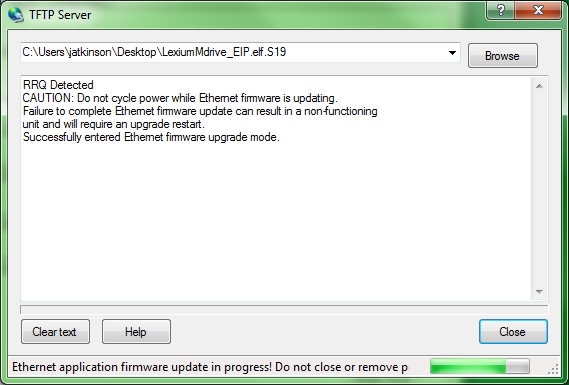 Figure 12: Ethernet firmware upgrade in process
 - Follow the instructions on the screen upgrade complete dialog by cycling power to the drive to allow the power to completely drain from the drive before reapplying. The firmware upgrade is now complete and the drive is ready for IP address and EIP configuration settings changes per your application.
 Figure 13: Upgrade process complete!
 - You may also now close the Telnet Client on your desktop..